Nginx 动态生成缩略图
生成缩略是个消耗cpu的操作,如果访问量比较大的站点,最好考虑使用程序生成缩略图到硬盘上,或者在前端加上cache或者使用CDN。所以下面我们配置将生成的缩略图保存到硬盘供下次访问
场景:
假设现在有一个项目,目录为/home/wwwroot/test,项目保存原图的路径是/home/wwwroot/test/public/uploads,现在创建缩略图的缓存目录/home/wwwroot/test/public/cache,假设你的nginx配置文件分为nginx.conf,并且针对单个项目有子配置文件(如www.test.com.conf),nginx.conf中引入了www.test.com.conf
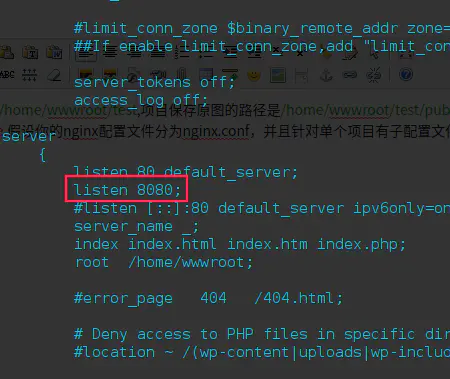
配置文件nginx.conf,在原有配置的基础上添加8080端口监听:
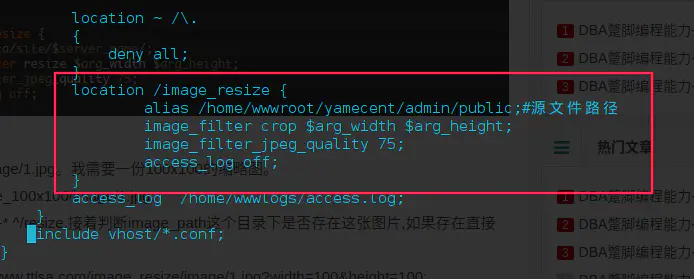
配置文件nginx.conf,在原有配置的基础上添加压缩处理图片的功能(image_resize):
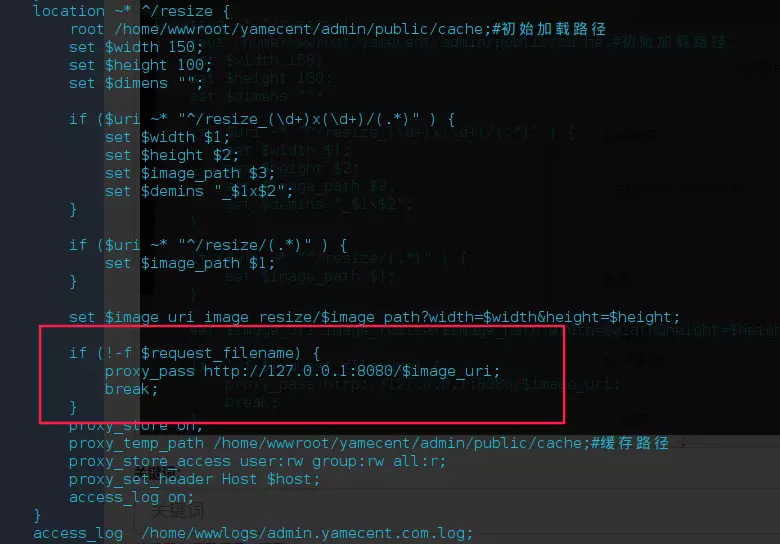
配置文件www.test.com.conf,在原有配置的基础上添加接收压缩图片的请求处理:
处理流程:
1.假设有一张原图,在/home/wwwroot/test/public/uploads/1.jpg下,原图url:https://www.test.com/1.jpg
2.当请求url:https://www.test.com/resize_100x100/1.jpg 时,这个请求进入了location ~* ^/resize,接着判断image_path这个目录下是否存在这张图片,如果存在直接返回给用户
3.如果不存在,则转发到https://127.0.0.1:8080/image_resize/1.jpg?width=100&height=100;
4.image_resize将图片裁剪压缩并缓存到服务器本地/home/wwwroot/test/public/cache/resize_100x100/1.jpg,并返回给用户
配置代码(nginx.conf):
listen 8080;
location /image_resize {
            alias /home/wwwroot/yamecent/admin/public;#源文件路径
            image_filter crop $arg_width $arg_height;
            image_filter_jpeg_quality 75;
            access_log off;
    }
配置代码(www.test.com.conf):
location ~* ^/resize {
        root /home/wwwroot/yamecent/admin/public/cache;#初始加载路径
        set $width 150;
        set $height 100;
        set $dimens "";

        if ($uri ~* "^/resize_(\d+)x(\d+)/(.*)" ) {
            set $width $1;
            set $height $2;
            set $image_path $3;
            set $demins "_$1x$2";
        }

        if ($uri ~* "^/resize/(.*)" ) {
            set $image_path $1;
        }

        set $image_uri image_resize/$image_path?width=$width&height=$height;

        if (!-f $request_filename) {
            proxy_pass https://127.0.0.1:8080/$image_uri;
            break;
        }
        proxy_store on;
        proxy_temp_path /home/wwwroot/yamecent/admin/public/cache;#缓存路径
        proxy_store_access user:rw group:rw all:r;
        proxy_set_header Host $host;
        access_log on;
}博主的文章或程序如果给您带来了价值,感谢您打赏一二

微信扫码支付

支付宝扫码支付